Dependencies are formed in innumerable ways when developing within Salesforce, and not just those that are made explicitly while writing code but also those formed by using declarative tools.
In this blog, we will be reading about how to simplify and consolidate how and where to configure at runtime certain dependencies between VisualForce, Apex, or Lightning Component Code.

At runtime, forming dependencies instead of explicitly during development can be of great benefit. If you have been looking to decompose a huge org into multiple DX packages or build a highly configurable solution, the Force DI open source library will be of great use to you.
Before we start, it is important to note that the DI bit in Force DI stands for Dependency Injection that is a form of IoC (Inversion of Control).
Both of them are well-established patterns to provide the runtime glue between two points. Let us get started with an Apex example. We need to forgo the use of the “New” operator in order to use Dependency Injection at the point where we want to do the injection. For instance, we may consider the following code:
PaymentEngine engine = new PayPal();
In the above-mentioned example, we are explicitly expressing a dependency that means we will be required to package or deploy all our payment engines together and we would hardcode a finite set and forgone extensibility. With Force DI, we can simply write:
PaymentEngine engine = (PaymentEngine) di_Injector.Org.getInstance(PaymentEngine.class);
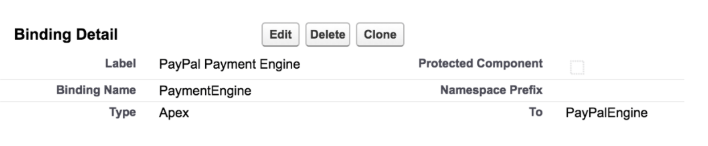
You may be wondering, how it will then come to the conclusion on which class to instantiate. Let us understand this in-depth.
The dynamically discovered binding configuration is used by the Injector class to identify which class to actually instantiate. This configuration may be packaged (e.g. “PayPal Package”), admin controlled, and/or defined dynamically via code. We can enable dynamic binding by setting up binding config via code via reading other configurations (e.g. the payment preference of the user) and binding accordingly.
We can select deploy/package other payment gateway implementations independently due to this indirection while also being sure that the implementation is resolved consistently and seamlessly everywhere any other code requires a PaymentEngine.
Can This Help Us With Other Forms Of Dependencies As Well?
Of course, yes! Let us take the example of Lightning Component used as an Action Override. Generally, we would have created a Lightning Component and directly associate it with an action override. This, however, means that the action override, object metadata, and the Lightning code (and everything dependent on it) must seamlessly travel around together and not in separate DX packages. This also means that we would be required to code all the different variations, if required, of this action into a single component.
Let us now find out the Lightning Component Action Override would appear without the Dependency Injection:
<aura:component implements=”lightning:actionOverride,force:hasSObjectName”>
<lightning:cardtitle=”Widget”>
<p class=”slds-p-horizontal_small”>Custom UI to Create a Widget ({!v.sObjectName})</p>
</lightning:card>
</aura:component>
This component along with all its dependencies will be referenced directly in the Action Override below:

Let us now have a close look at this again but by using the Lightning c:injector component:
<aura:component implements=”lightning:actionOverride,force:hasSObjectName”>
<c:di_injector bindingName=”lc_actionWidgetNew”>
<c:di_injectorAttribute name=”sObjectName” value=”{!v.sObjectName}”/>
</c:di_injector>
</aura:component>
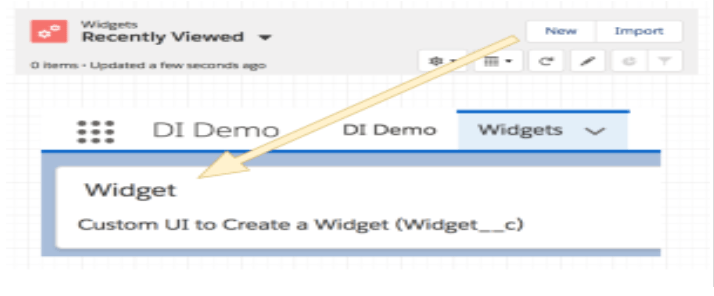
A generic naming convention like actionWidgetNew is followed by the above component, which is bound to the Action Override and now appears like:

The binding configuration will appear like this:
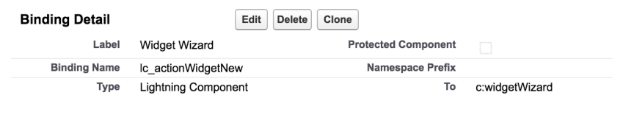
The injected Lightning Component widgetWizard will look like:
<aura:component>
<aura:attribute name=”sObjectName”type=”String”/>
<lightning:card title=”Widget”>
<p class=”slds-p-horizontal_small”>Custom UI to Create a Widget ({!v.sObjectName})</p>
</lightning:card>
</aura:component>
At Cloud Analogy, we can help you with Salesforce Integration, Salesforce Consulting Services, and Salesforce Implementation.
Contact our experienced and certified Salesforce Implementation Partners, Salesforce Integration Experts, and Salesforce Lightning Consultants now!