Sales representatives spend a big part of their day working on their emails and switching back to Salesforce to access customers, leads, opportunities, and prospects. The best thing is that this problem can be easily solved by integrating Salesforce with Outlook.
According to McKinsey & Company, 28 percent of the time spent by sales reps daily is devoted to emails and calendars. Reps can spend less time switching between Salesforce and Outlook and less time entering data.
Let me guide you about the advantages of Salesforce integration with Outlook before discussing the complete integration process.
Benefits Of Salesforce And Outlook Integration
- The integration of Salesforce with Outlook helps reps focus on what matters most – their sales!
- Reduce and eliminate the time they spend on redundant data entry into Salesforce and Outlook.
- Access critical Outlook email messages and relevant salesforce records in a unified place that makes it easier for crafting meaningful, relevant, and targeted email communications to customers and prospects.
How Integrating Salesforce With Outlook Helps Sales Reps?
- There is no need for the sales reps to leave Outlook when creating salesforce records like accounts, contacts, leads, opportunities, and records based on custom objects.
- Reps can easily search for Salesforce records, including the ones based on custom objects.
- Relate non-recurring calendar events and email messages to multiple contacts of Salesforce and to any other Salesforce record that accepts email messages or tasks.
Process Of Salesforce And Outlook Integration
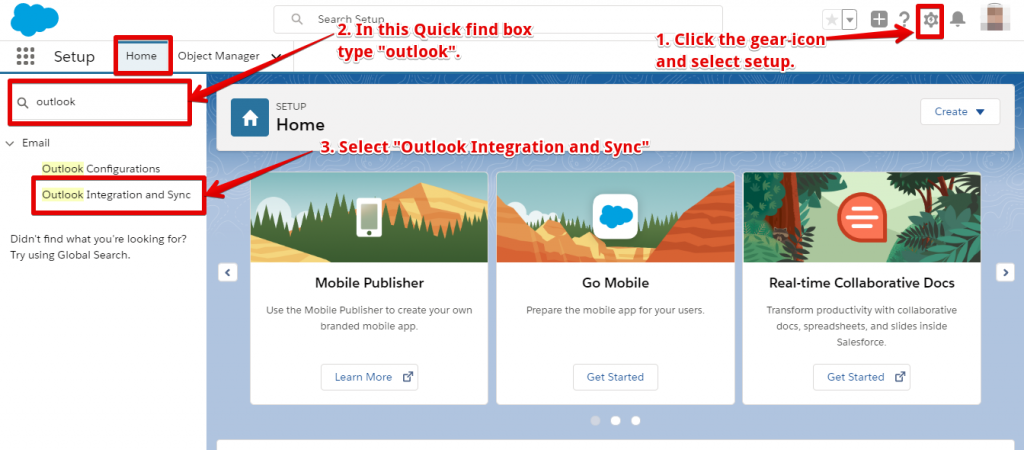
- Click on and select Setup.
- In the Quick Find box, enter Outlook and then proceed to select Outlook Integration and Sync.
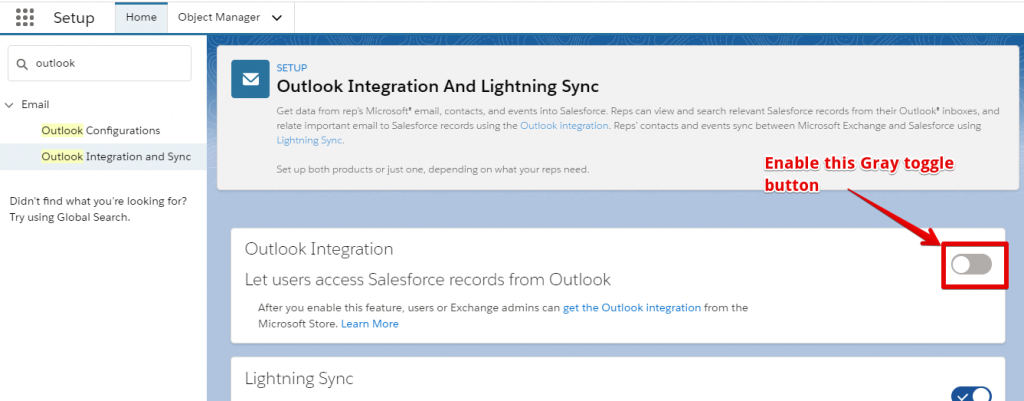
- It will now be the time to turn on the Outlook Integration.
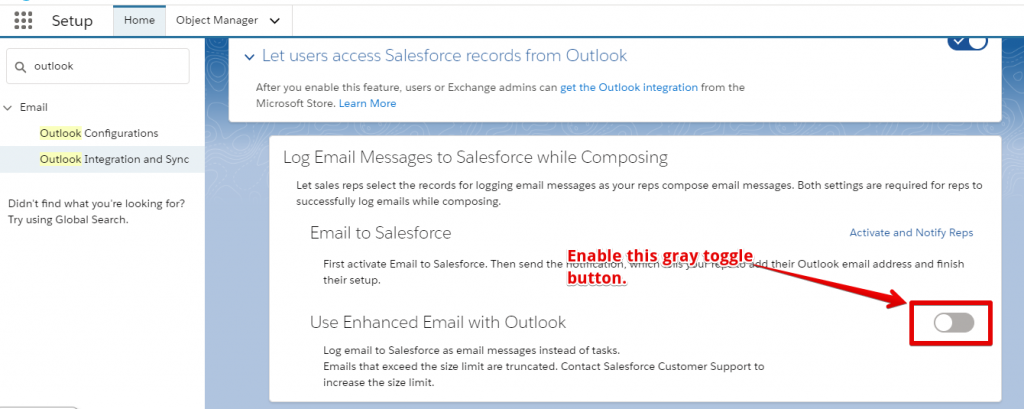
- After that, it will be time for reps to relate newly-composed email messages to Salesforce records. For this, we will need to turn on Use Enable Enhanced Email with Outlook and Email to Salesforce.

- Enable the toggle button in “Use Enhanced Email with Outlook.”
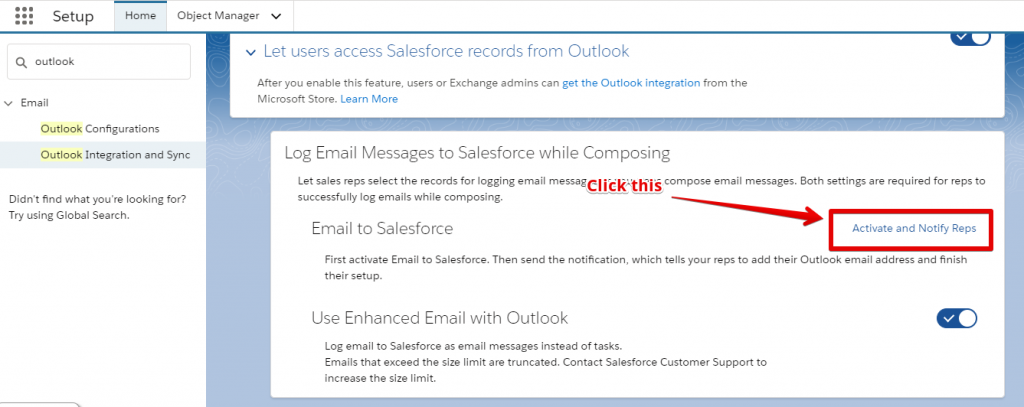
- Click the “Activate and Notify Reps” link.
- Click the “Edit” button in Email to salesforce.
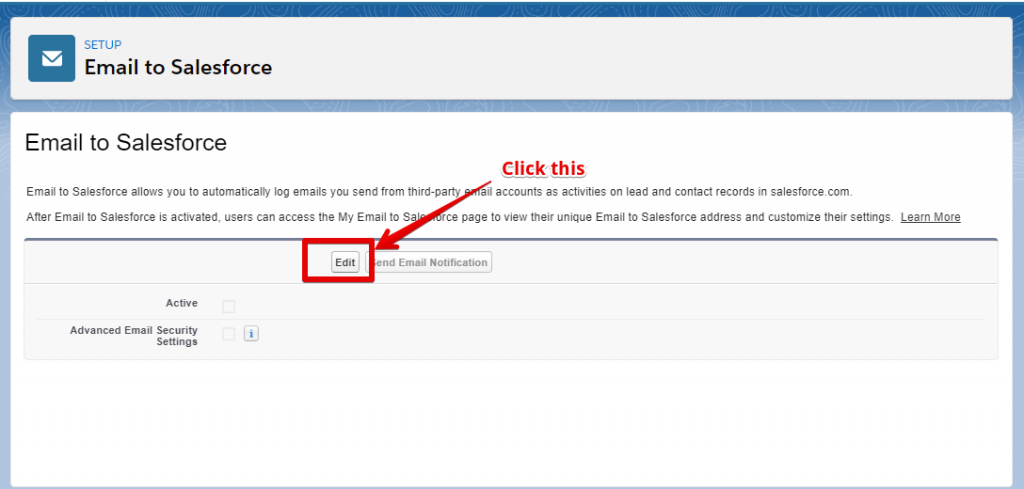
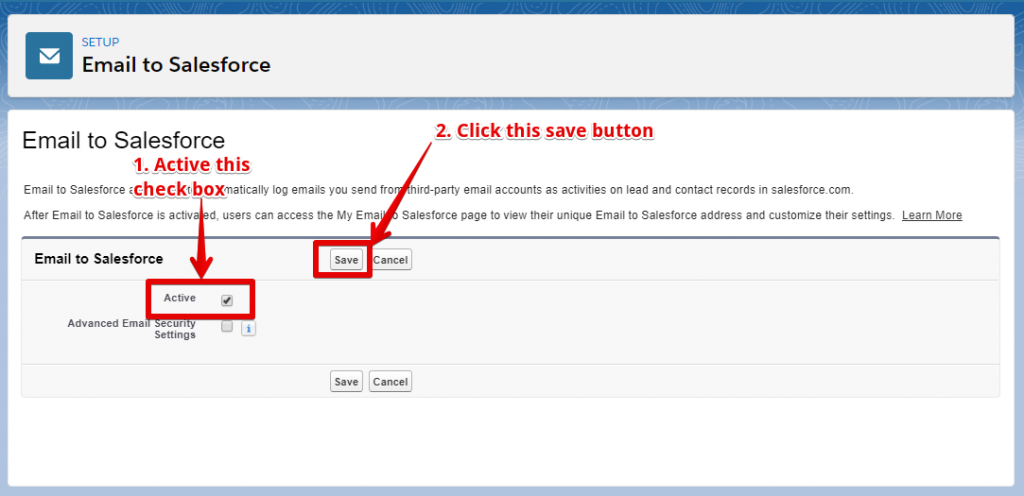
- Click the Active checkbox and then click the save button.
- Click the ‘Skip this step’ button, and ‘Setup in Salesforce Org’ is completed.

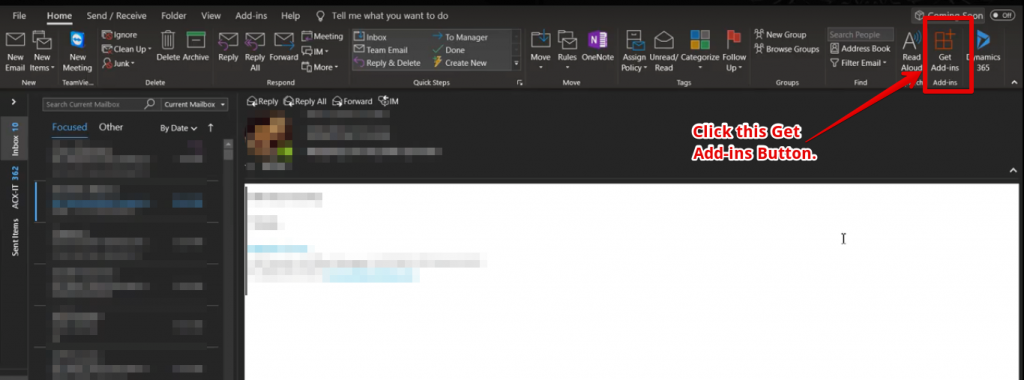
- You can open Outlook and click on the “Get Add-ins” buttons on the top right corner.
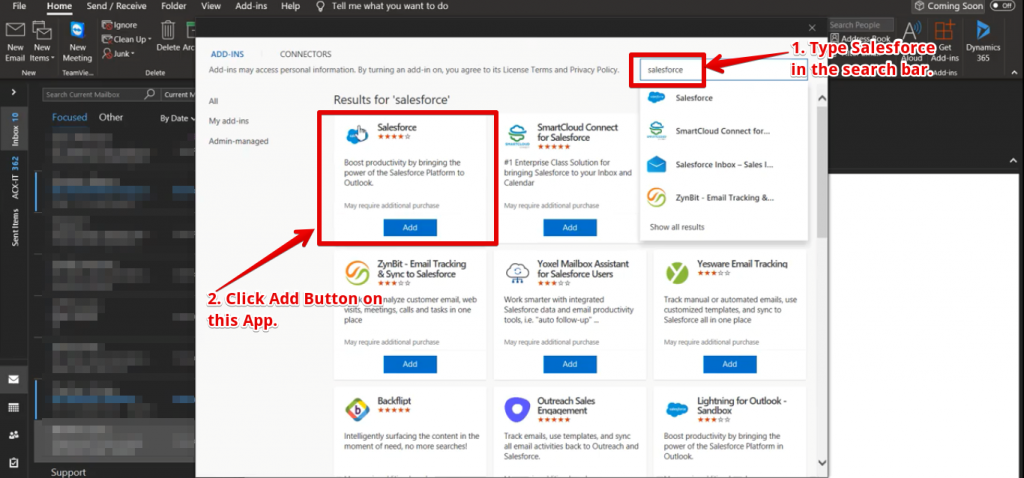
- Once this has been completed, you can type ‘Salesforce’ and then click on the ‘Add’ button.
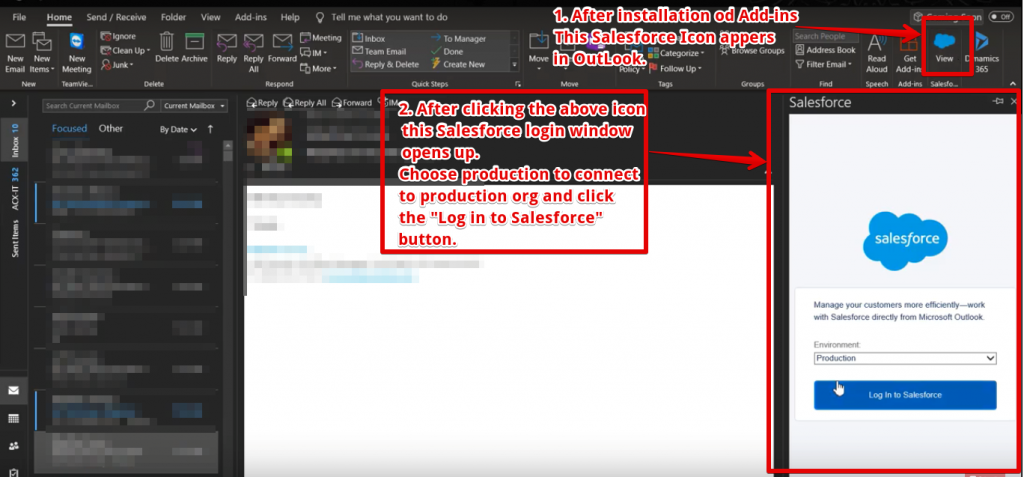
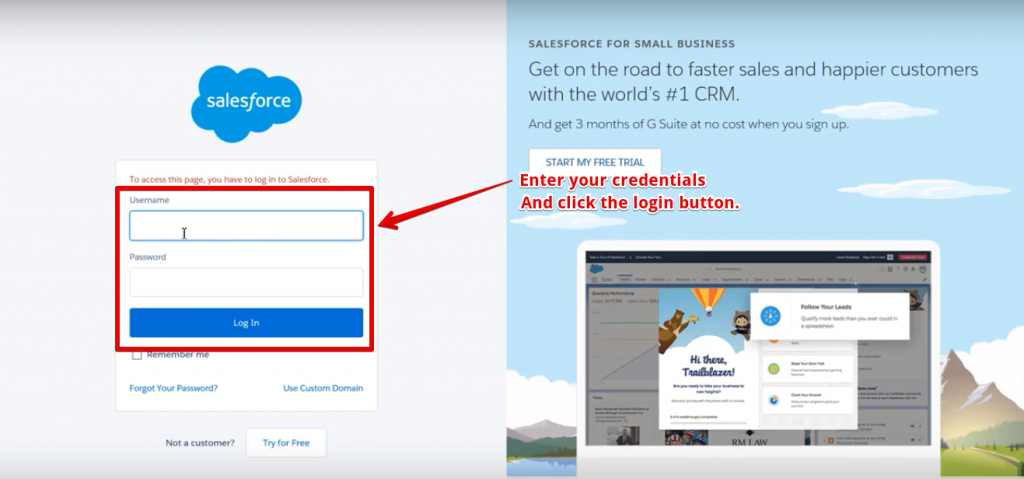
- Now you are required to fill in your Salesforce login credentials and click on the “Log In” button.”
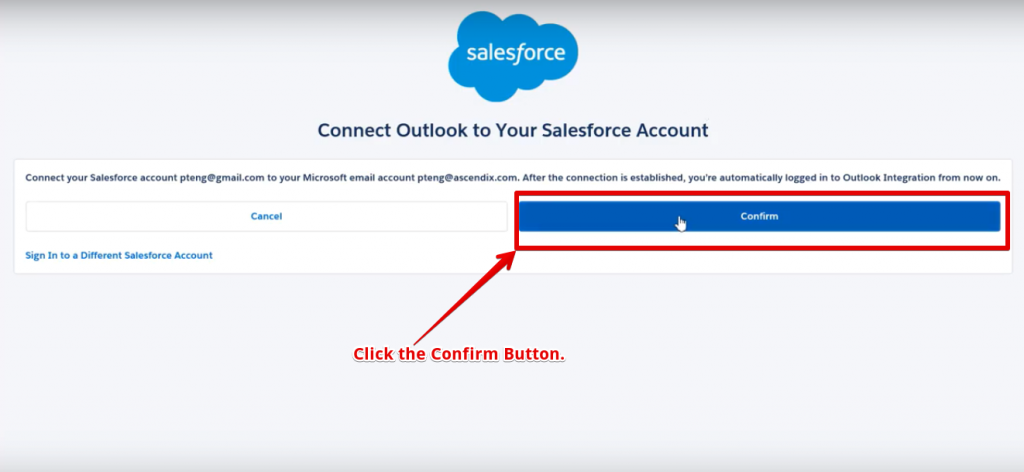
- You can now see the Salesforce window connected.

Integrating Outlook with Salesforce is an amazing way to keep the sales representatives productive with the tools they prefer and rely on. The best thing is that bringing the Salesforce experience into Outlook minimizes the reps’ requirement to switch between Salesforce and Outlook so that reps don’t miss a beat.
Find out how Cloud Analogy is transforming organizations worldwide with the best of custom CRM integration services such as Salesforce integration with Outlook, Salesforce integration with Gmail, and Salesforce Integration other third-party tools.


